Variables management
Note: Access to the Variables screen requires the role 'Dataflow/Document Templates and Variables' (see Roles).
Note: The Variable Definitions interface in the Manage Data workspace (see Variable Definitions and Metadata) can be used to edit existing variable and property definitions (but not to add new definitions), and also to add extra 'metadata' columns to store additional information about each variable or property. All users can view variable data in read-only mode in this interface; the additional role is required to modify the variable data and metadata.
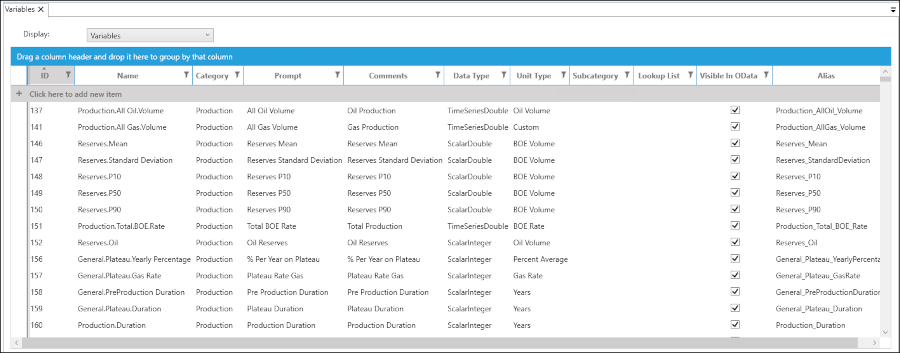
The Variables management screen is used to create and manage variables and document properties in Dataflow.
To open the management screen in the Dataflow Configuration workspace,
click the Variables
button  on the ribbon.
Use the Display selector to switch between Variables and Properties.
Properties are the equivalent to 'General' category variables in Version 16.5.
A property is a special class of variable (with the category 'Property') that belongs to a document, its value is not configurable in each scenario. See Properties.

When this screen opens, a new tab called Variables is added to the ribbon, which contains the Save button to save changes. When the tab label contains an asterisk ('Variables*') there are unsaved changes. You can discard changes by clicking the close button X in the tab header and selecting 'No' in the dialog.
Important: A variable cannot be deleted. It can be edited, except for its Category and Data Type attributes.
Variables table
You can copy values from the Variables table into an external application such as Excel by highlighting rows and pressing CTRL+C.
| Column heading | Description |
|---|---|
| ID | Unique identifier assigned automatically to a variable when it is created. |
| Name | The variable name must be unique and it is recommended to organize names using the Dot Notation. The name can be up to 255 characters long and contain any characters except for the symbols: , \ : * < > @ ? | " + [ ] |
| Category | The Category is selected when a variable is created and cannot be changed later. Properties always have the category 'Property'. The set of available categories can be modified in the Variable Categories interface in the Manage Data workspace (see Variable Categories). The default categories are: Capital, Drilling, Economics, Facilities, Financials, Opcosts, Price, Production, Project, Reserves, Revenue. |
| Prompt |
User-friendly variable name which must be unique. It is used in document templates and calculated expressions. It can be up to 150 characters long and contain any characters except for the symbols: , \ : * < > @ ? | " + [ ] Note: If you change a Prompt which is used in an expression, the expression will become invalid and will have to be updated manually (see Expression Editor.) |
| Comments | A description of the variable. This will be displayed in tooltips. |
| Data Type | The type of the variable's content. The data type is selected when the variable is created and cannot be changed later. See Variable Data Types. |
| Unit Type | The variable's units of measurement. This setting is available only for numeric variable types and it is mandatory. The Custom option can be used when the required unit is not already available (see Custom units of measurement). Note there are also several 'No Unit' types available to use. For example, to calculate a total cost per period, two variables are needed: a variable for the day rate (currency) and a variable for days used (which has no units). |
| Sub Category | Sub-categories can be added for the ArrayDouble data type. They are used to categorize the items in that array; for example, an array variable for development capital could be separated into facilities, drilling, pipeline, and so on. The category strings can be entered as a manual list or can be based on a Dataflow list object (see Lists). |
| Lookup List |
(OPTIONAL) Only available for the ScalarString data type: A Lookup List can be defined to restrict the values the variable can take. When the variable is used in a document, the values will be displayed in a dropdown list. The allowed values can be entered as a 'Manual' list that is specific to this variable, or it can be based on a Dataflow list object (see Lists). Important: When the variable is linked in a template, if the templates' Lookup List option is set it will override this variable-level setting (it's content will not be accessible to users); see Add content elements to templates. |
| Visible In OData | Checkbox to specify if the variable should be visible for queries made through the OData API. |
| Alias | This is the variable's alias which is used to reference it in OData API requests based on the 'Tall' and 'Wide' tables. If the variable is set as not visible in OData then the Alias can be blank. If the variable is set as visible then it must have a value. A default value will be assigned based on the variable's Name. The Alias value can be edited at any time. (See further details in the 'Variable Alias' section below.) |
Create a new variable
To add a new variable, click in the area labelled Click here to add new item at the top of the table. A new row will be added at the top of the table where you can create a new variable:

Some initial values (in the form of "New Variable (X)") are automatically inserted in the 'Name', 'Prompt', and 'Comments' fields and you will most likely want to replace these. You do not insert anything in the 'ID' column; an ID number will be automatically-allocated when the new variable is saved.
New variable rows will appear in italics in the Variables table until you do a Save.
Variable Alias
The Alias value is used as the variable reference in OData API requests involving the 'Tall' and 'Wide' data tables. The Alias must be unique and the first letter must be in upper case. Symbolic characters cannot be used except for underscore, and spaces cannot be used.
If the variable is set not to be used via OData (i.e., the option Visible In OData is disabled) then the Alias can be blank.
If Visible In OData is set to enabled and the Alias is blank, a default value will be inserted, based on the variable's Name value with spaces and symbolic characters replaced (e.g., spaces and dots are replaced by underscores, the % symbol is replaced by 'Pct', ampersands are replaced by 'And').
The Alias value can be edited at any time. Changing the value can be useful for meaningful naming of variables as they appear to users via OData (e.g., users working in an OData client such as Power BI), and contracting the Alias so as to shorten API request strings, since there is a limit on the allowed total string length for API requests.
Searching and filtering
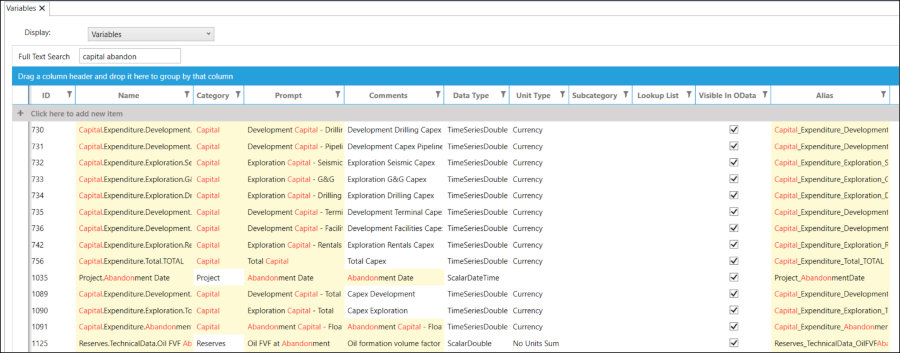
Full Text Search
The Full Text Search box can be opened by clicking anywhere in the table and typing CTRL+F. The box will appear above the table. To close the search box, click the X button at the right-hand end.

You can type one or more search terms into the box, separated by spaces. The displayed list will be dynamically filtered based on the search terms, using an implicit OR operation (i.e., at least one out of multiple terms must match); the terms are matched with any text found in the columns Name, Category, Prompt, Comments and Alias. Matching items are highlighted in red text and yellow background.
To make an exact text match, put the search term in quotation marks, "abandonment capital" for example.
Filtering
If you click a filter button  in a column header, a filter dialog will be
displayed. Here you can set up filters to show variables which match particular criteria. To remove a column filter,
re-open its dialog and click Clear Filter.
Grouped table view
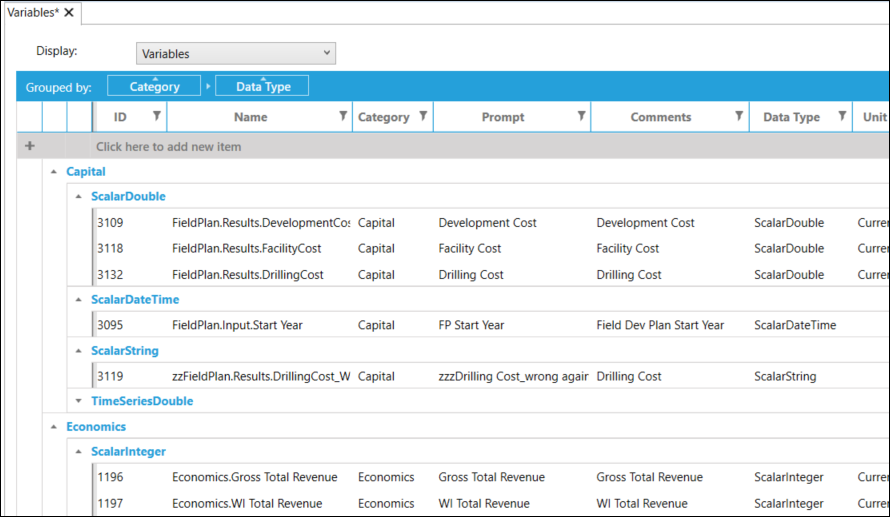
You can create a grouped table by dragging and dropping one or more column names to the blue bar Drag a column header and drop it here ... above the headers.
The list of variables will be organized in a hierarchy based on the columns selected. For example:

To remove the grouping, hover the mouse over a column name in the blue bar and click the X button that appears. By clicking the column name text you can toggle the list ordering between ascending and descending.
If two or more columns are selected for grouping, you can change the hierarchy ordering by dragging a column name left or right within the blue bar.
